# Solo 软件升级
这篇文章详细介绍了ArduCopter版本3.5.0的升级和运行情况,以及更高的3DR Solo.
## 概览
3DR Solo包含的很多内容中包括一个Pixhawk 2.0自动驾驶. 它与早期的ArduCopter 3.3的高度定制分支一起,由3DR专门为Solo编译. 当你在新的索洛(或工厂重置后)上做飞行前初始更新时,更新的一部分是ArduCopter的这个索洛分支. 它安装在Pixhawk上,并拥有所有必要的默认参数和定制的烘烤到其中. 它在幕后对用户基本透明。 由于3DR不再从事消费UAS业务,ArduCopter的这个定制分支将不会看到任何进一步的更新. 最近一次更新是在2016年初,现在远远落后.
## 3D后的生活( 3D)
由于索洛号使用皮克斯霍克自动驾驶,除了3DR定制的索洛版本外,它还能运行ArduCopter的变体. 文章将专注于安装,配置,运行在3DR Solo上3.5.0或更高版本的ArduCopter. 为什么不让Solo成为现代、先进、能力强的SUAS? 自动驾驶固件有无数的进步 使它更稳定,更可靠,更敏捷 船模式,RTK GPS,增强遥测,ADS-B,lidar激光测高仪,地形意识和跟踪,IR精密着陆,甚至"室内GPS"等许多新的功能.
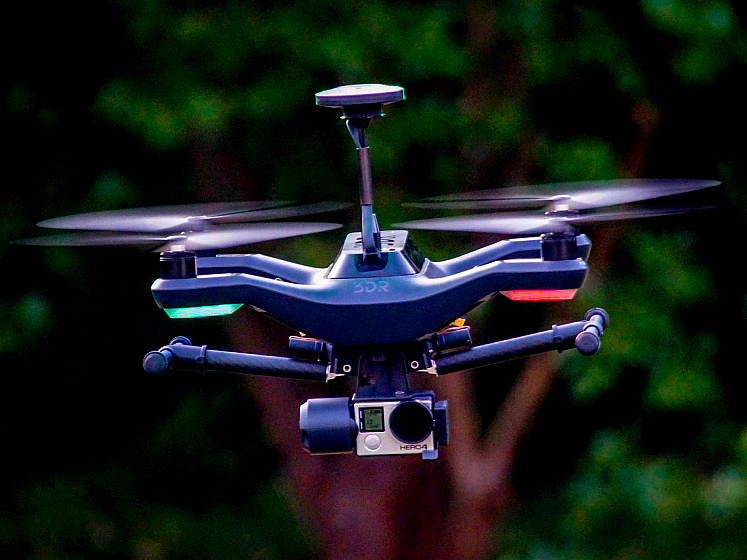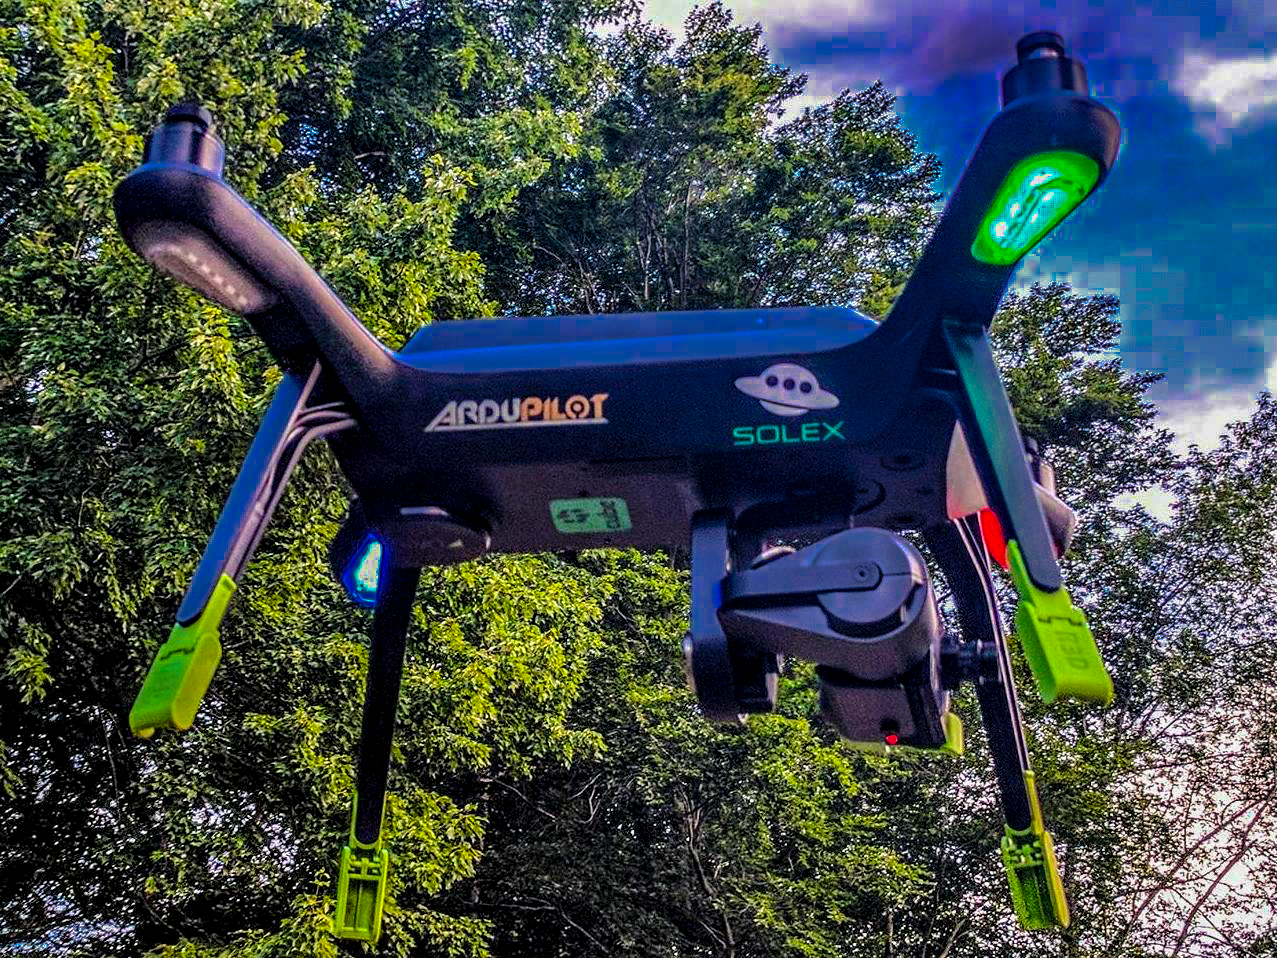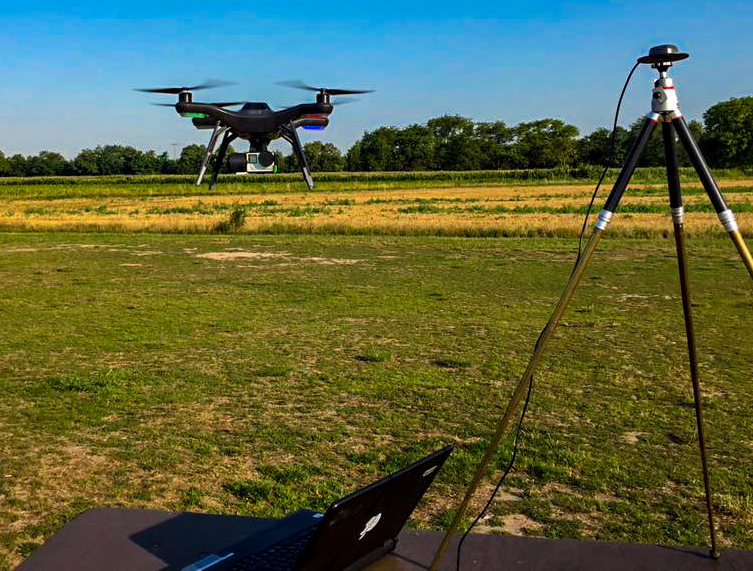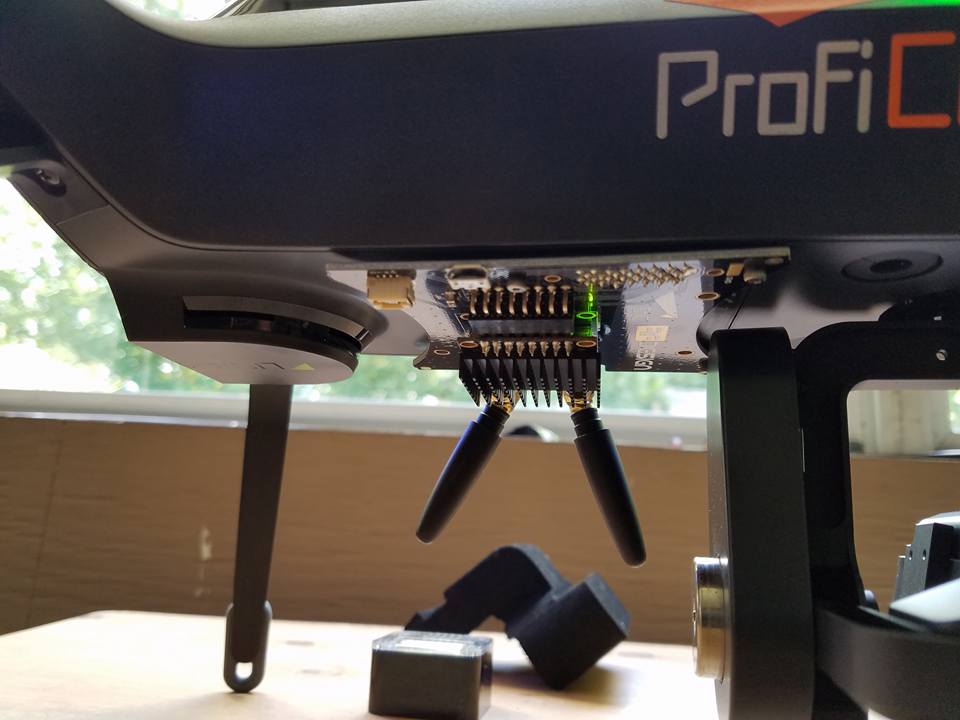*36 照片来自Andrew Emmett、Matt Lawrence、Stephan Schindewolf、及Paul Dinardi,*
## 硬件要求
Pixhawk 2.1 (CubePilot CubeGreen/CubeBlack) (或一种传统的几分钟内跳动设定为5伏特的Cube) 目前需要安全可靠地使用ArduCopter 3.5.0及更高的3DR Solo. 你可以从[无人机](http://www.jestersdrones.org/store/index.php?rt=product/category&path=68)或直接从[立方体助理软件](https://www.cubepilot.com). 立方体有显著较先进的组件. 这包括3个温度控制式IMU和5伏特信号机,Solo号需要安全运行. 如果你已经有一个立方体,可以设置一个内部的售货员跳跃器到5伏特信号,并用确实是在你的独奏中. 绿色立方体与这个跳跃器预设为5伏特.
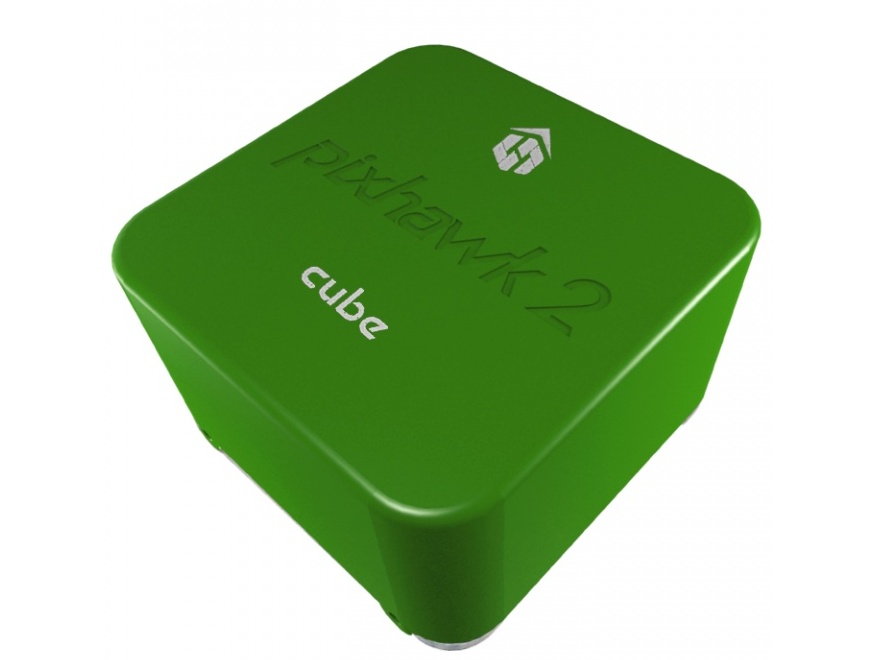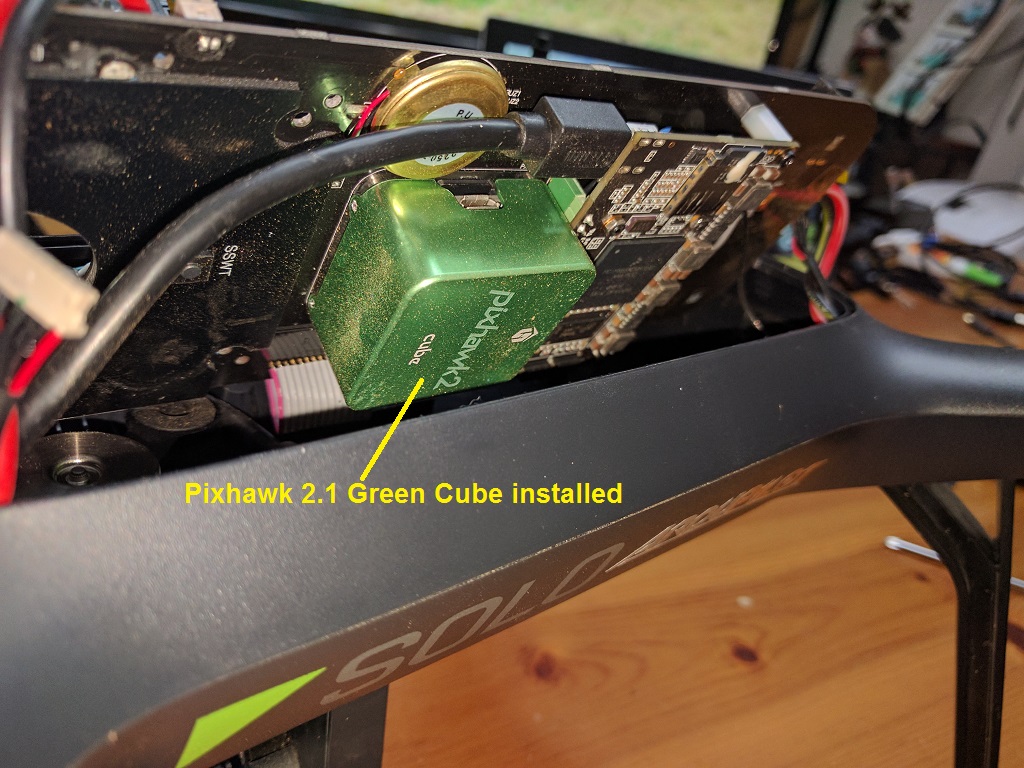You *can* install ArduCopter master on the stock Pixhawk 2.0, but it is highly discouraged. It will install, and it will fly. But you are at fairly high risk for motors shutting down in flight, leading to a serious crash. This is because of an electrical hardware flaw in the Solo's motor pods. The old stock firmware has a software patch to *mostly* mitigate this flaw. This is what you may hear referred to as "slew rate protection". You can view the code for the slew rate protection in the stock 3DR firmware [here on their GitHub site](https://github.com/3drobotics/ardupilot-solo/blob/master/libraries/AP_Motors/AP_MotorsMatrix.cpp#L388). The production versions of ArduCopter, including ArduCopter 3.5 do not have this slew rate protection. It is severely handicapping and difficult to manage for a world of vehicles that use ArduCopter besides the Solo. The 5 volt signalling used in the Pixhawk 2.1 (CubePilot CubeGreen/CubeBlack) effectively solves the electrical problem on the motor pods.
There are other potential ways to mitigate the electrical problem with the motor pods without buying a new Cube. You could use conventional DIY ESCs and bypass the ones built into the motor pods. Or you could build a level converter that steps the signalling voltage up from 3v to 5v. None of these solutions are commercially available as a kit, but can be done on a DIY basis if you are creative. You would not have the benefit of enhanced hardware in The Cube, but it would be just as safe and reliable to fly.
You cannot use the old stock 3DR Solo firmware on the Cube. It is entirely incompatible. This also means you cannot do a factory reset on the Solo with The Cube still in the Solo. The factory reset tries to reload the old Solo firmware, which is incompatible. If you need to Factory Reset, you will need to put the old stock Pixhawk 2.0 back in, run the full factory reset and update, then put the Green Cube back in. This is annoying, but there is no way around it now or in the foreseeable future. In short, do not need to factory reset. Which also means do not lose your WiFi password! Do not throw away your old stock cube!
## Resources
There are several great resources online for modification ideas,vendors, beta testing firmware, troubleshooting, and support
- [Solo Beta Test Facebook group](https://www.facebook.com/groups/617648671719759/)
- [Solo Mod Club Facebook group](https://www.facebook.com/groups/3DRSOLOModClub/)
- [Solex Users Facebook group](https://www.facebook.com/groups/176789056089526/)
- [ArduPilot Discuss Forums](https://discuss.ardupilot.org/c/arducopter/copter-3-5)
- [ArduPilot copter Wiki](https://ardupilot.org/copter/docs/common-advanced-configuration.html)
- [3DR Pilots Forum](https://3drpilots.com/)
- \*\*Solo Battery Calibration Process \*\*
## Upgrade Process
## Preparation
Before beginning the upgrade to ArduCopter 3.5 with the Pixhawk 2.1 (CubePilot CubeGreen/CubeBlack) on your Solo, you need to complete some important requisites.
- Complete Solo and controller in good working order, paired, flyable, and fully charged.
- Solo and controller both up to date with current 3DR Solo firmware from the initial pre-flight update. The current 3DR firmware is 2.4.2.
- Flight tested, working properly in all respects. An untested or malfunctioning Solo should not be used for this process. It won't fix it.
- Pixhawk 2.1 (CubePilot CubeGreen/CubeBlack)
- Philips and flat head screwdrivers
- Solex App for Android or a Windows PC for Mission Planner and WinSCP
## Instructions
There are two ways to do the upgrade that have detailed instructions published here.
- \*\*Initial installation using the Solex app \*\*. This is by far the most straight forward and highly recommended method. Solex has the means to load and reset firmware and parameters, and has access to all the necessary files online directly.
- \*\*Initial installation using Mission Planner and WinSCP \*\*. This method is a little more involved but is just as successful. You will need to download zip files, use Mission Planner to change settings, and use WinSCP to transfer files. If you do not have the Solex app, this is the method you will need to follow.
## FIRST FLIGHT
Once the upgrade process is complete, you're ready to make your first flight using ArduCopter 3.5 on the Solo. It is recommended that your first flight be conducted at a location and time that allows you to test some basic functions and safety systems. Choose a wide open are free of obstructions, crowds of people, lakes, etc.
## Solo/Solex App Settings
You will need to go through all the settings in the 3DR Solo App (and the Solex app if you use that too) to verify and update sliders, options, and settings. Hot items to set include in this sweep include but are certainly not limited to:
- RTH altitude
- RTH/RTM\* & Rewind
- Maximum altitude
- A/B Buttons
- Advanced Flight Modes
- Speed sliders
- GoPo settings
## Go Airborne
With all of the above complete, it is time to take your first flight on ArduCopter master!
- Take off and verify the Solo flies stable and predictably.
- Test all axes... pitch, roll, yaw, climbs, descends, and even all at once.
- Test the flight modes you have on the A & B buttons
- Make sure you are getting a good GPS lock
- Make sure the distance, altitude, speed, modes, and GPS data displayed on the app and controller are correct and as you expect to see.
- Let the battery run down to the failsafe while hovering safely nearby. Observe its behavior and verify it appropriately executed the RTH/RTM procedure.
**说明**:
If you need help troubleshooting a problem during with this process or have questions, the [Solo Beta Test Facebook group](https://www.facebook.com/groups/617648671719759/) is the best place to go.
## ArduCopter Parameters
There are over 700 parameters in ArduCopter. For everyday use of the Solo, you still do not need to worry about any of them. They're all pre-set for you in the above processes and by way of defaults. All the configuration parameters for the Solo that require a value different from the ArduCopter defaults can be found in the [ArduPilot GitHub repository /tools/frame\_params/ directory](https://github.com/ArduPilot/ardupilot/blob/master/Tools/Frame_params/Solo_AC35.param). These are the parameters that are loaded during the upgrade process. If you are not familiar with editing parameters and have no special use case to warrant changing them, altering them is not recommended.
However, there are some advanced and special use cases that may require changing some parameters. Some key parameters for advanced users are detailed below. This list will likely grow as new use cases and modifications develop.
| \*\*COMPASS\_ORIENT \*\* is the orientation of the external compass. |
|---|
| Value | Meaning |
|---|
| 38 | Stock compass in right rear leg |
| 0 | HERE External Compass |
| \*\*FS\_THR\_ENABLE \*\* controls how the Solo respond to a loss of signal from the controller. |
|---|
| Value | Meaning |
|---|
| 0 | No failsafe. This should not be used. |
| 1 | RTH/RTM will initiate if GPS available. If no GPS, Solo will land. |
| 2 | Continue with Smart Shot or auto mission. Otherwise RTH/RTM if GPS available. If no GPS, Solo will land. |
| 3 | Land only, no RTH/RTM. This is useful for indoor flying. |
| FS\_BATT\_ENABLE controls the low battery failsafe action for Copter-3.5 (and earlier). For Copter-3.6 (and higher) check the \*\*BATT\_FS\_LOW\_ACT \*\* parameter. The low battery failsafe kicks in when when the values set in parameters `FS_BATT_VOLTAGE` or `FS_BATT_MAH` are breached. |
|---|
| Value | Meaning |
|---|
| 0 | No failsafe action |
| 1 | Land immediately, no RTH/RTM. Useful for indoors. |
| 2 | RTH/RTM |
| FS\_BATT\_VOLTAGE is the low battery voltage threshold for Copter-3.5 (and earlier). For Copter-3.6 (and higher) check the \*\*BATT\_LOW\_VOLT \*\* parameter. When the battery voltage drops below this point, the low battery beeper sounds and it will do what you have `FS_BATT_ENABLE` set for. This value is expressed in volts. The default is 14.0. You can adjust this higher or lower depending on use case and preference. |
|---|
| Value | Meaning |
|---|
| 0 | No low voltage alarm or failsafe |
| 14 | 14 volts |
| FS\_BATT\_MAH is the battery capacity remaining threshold expressed in milliamperes (MAH) for Copter-3.5 (and earlier). For Copter-3.6 (and higher) check the \*\*BATT\_LOW\_MAH \*\* parameter. When the battery remaining capacity drops below this point, the low battery beeper sounds and it will do what you have `FS_BATT_ENABLE` set for. The default is 520. On the solo, that is on average about 1.5 minutes of flying time remaining. You can adjust this up or down to fit your preference and use case. Setting it for 0 will disable capacity remaining based alarms and failsafes. |
|---|
| Value | Meaning |
|---|
| 0 | No battery capacity remaining alarm or failsafe |
| 520 | 520 MAH |
| \*\*WP\_YAW\_BEHAVIOR \*\* specifies the yaw behavior in auto missions and RTH/RTM. |
|---|
| Value | Meaning |
|---|
| 0 | No change. The Solo's yaw will keep pointing in the same direction unless you change it. |
| 1 | Face the next waypoint regardless of direction of flight. |
| 2 | Face the next waypoint except in RTH/RTM. |
| 3 | Face forward along the GPS course. |
| **NTF\_OREO\_THEME** controls the Solo's motor pod LED theme. This is for ArduCopter 3.5.0 and higher only. |
|---|
| Value | Meaning |
|---|
| 0 | Disabled |
| 1 | Aircraft theme with red/green front and white strobes rear. |
| 2 | Rover theme with white front & red rear (like a stock Solo used to be). |
| \*\*AHRS\_GPS\_USE \*\* is for enabling or disabling the GPS on you Solo. The default is 1 for enabled. The primary use case for disabling the GPS is for indoor flight. If the GPS is disabled, it cannot and will not try to use it for flight, failsafes, or any other function. That means RTH mode is not available. You must be familiar with how the failsafes work without a GPS. In most cases, the Solo will land since it cannot RTH. |
|---|
| Value | Meaning |
|---|
| 0 | GPS disabled |
| 1 | GPS enabled |
| \*\*LOG\_DISARMED \*\* enables and disables dataflash (\*.bin) logging when the Solo is disarmed. It is currently enabled by default since it can be very useful for testing and troubleshooting. But it does result in large and often unnecessary logs. If you are comfortable and confident in your Solo, you disable logging while disarmed. The dataflash logs be much cleaner and volumnous. |
|---|
| Value | Meaning |
|---|
| 0 | Disabled / No dataflash logging while disarmed |
| 1 | Enabled / Dataflash logging while disarmed and armed. |
## Further Information
*【本页后半部分仍为英文原文摘录,补译中。】*
---
*译自 ArduPilot Copter「3DR Solo - ArduCopter Master Upgrade」· [查看原文](https://ardupilot.org/copter/docs/solo_arducopter_upgrade.html) · CC BY-SA 3.0*